
A continuing worked example
Residential Design I
Follow one course from its purpose and semester journey to a connected Project Cycle and weekly studio experience.
See how research, drawings, models, critique, and revision contribute to an authentic residential challenge. Use the planning decisions to develop an approach for your own discipline.
Course at a glance
INDS 2313 · Residential Design I
Interior Design · Houston City College
16-week hybrid course
A compact-home challenge leads into a later community-design challenge.
One example, several scales
Course Blueprint → Student Journey → Project Cycle → Weekly Experience
Follow the connections
From course purpose to the next design decision.
Read the example in sequence or begin with the planning scale you need. Each section connects the residential work with a decision you can make in your own course.
Connect residential needs with professional practice.
Students investigate residential needs and develop proposals that respond to users, place, function, and professional expectations. Research, programming, schematic design, documentation, materials, making, and presentation contribute to that work.
The course provides opportunities to make and explain design decisions with increasing independence. Early examples, demonstrations, and coaching support the work; support can be adjusted as students take greater responsibility.
The Course Blueprint connects this purpose with approved outcomes, professional competencies, authentic experiences, evidence of learning, and assessment.
The semester question
How can residential design respond to changing human needs, housing challenges, and community life?
Project briefs give this broad question a specific client, location, design focus, and set of criteria. Students develop proposals through connected milestones rather than unrelated assignments.
Trace one course outcome.
Course outcome: Develop schematic drawings based on client briefs.
- Practice: Translate programming information and client needs into spatial alternatives.
- Experience: Develop three schematic alternatives and compare their responses to the brief.
- Instructional support: Model how criteria and tradeoffs inform a selection, then coach students as they compare their own alternatives.
- Evidence and assessment: Review the sketches, comparison, and explanation of the selected direction against the brief and criteria, including how feedback informed the decision.
Apply it to your course
Choose an important outcome. Connect it to a professional practice, a learning experience, the support students need, and evidence you can review.
Carry forward: One useful alignment in your Course Blueprint.
Continue to the semester journey → · Back to the example sections
Give each challenge a place in the larger course.
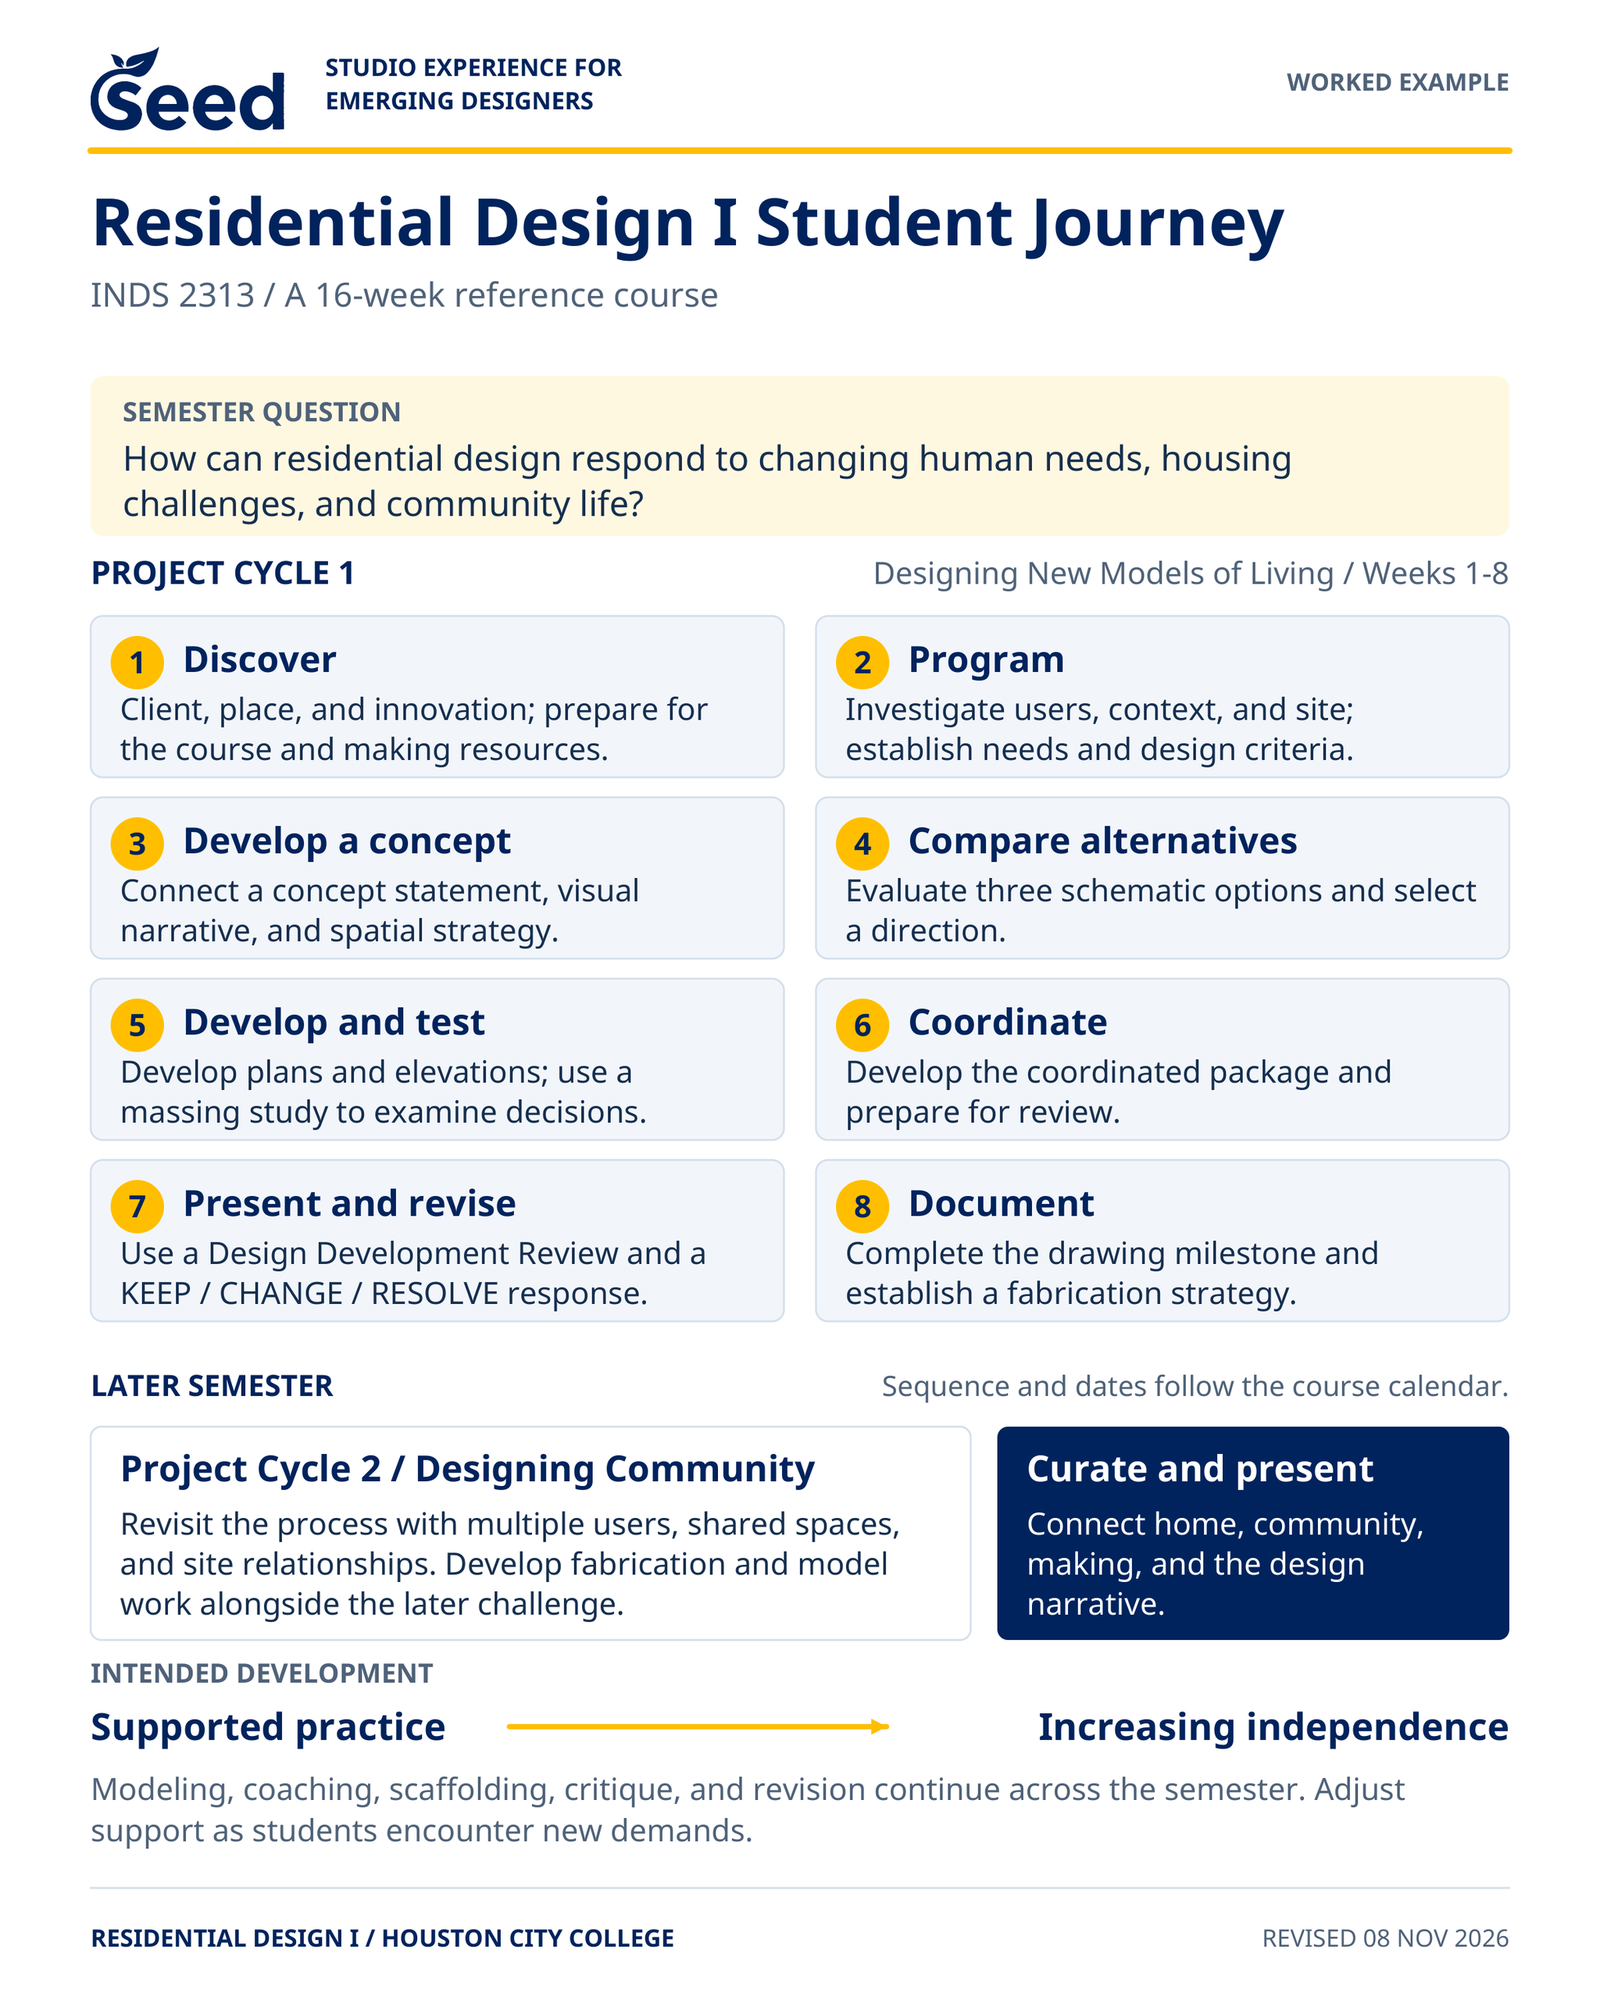
The Student Journey shows the course from the student perspective: major challenges, milestones, feedback, resources, and increasing responsibility.
Project Cycle 1 · Designing New Models of Living
During the first eight weeks, students develop a compact-home proposal. Client and site investigation lead into design criteria, schematic alternatives, developing drawings, a massing study, critique, revision, and a coordinated drawing milestone.
Later semester · Designing Community
A later Project Cycle extends the work to multiple users, shared spaces, and site relationships. Fabrication, exhibition, and presentation connect home, community, making, and the design narrative.
Adapt the structure. Two Project Cycles are the arrangement used in this course. Their number and duration should fit the outcomes, meeting pattern, and complexity of your own course.
Apply it to your course
Place your major challenges and milestones across the term. Show where students receive feedback, revisit decisions, and take greater responsibility.
Carry forward: A Student Journey connected to your briefs, Project Cycle plans, and course calendar.
Continue to Project Cycle 1 → · Back to the example sections
Keep activities connected to the challenge.
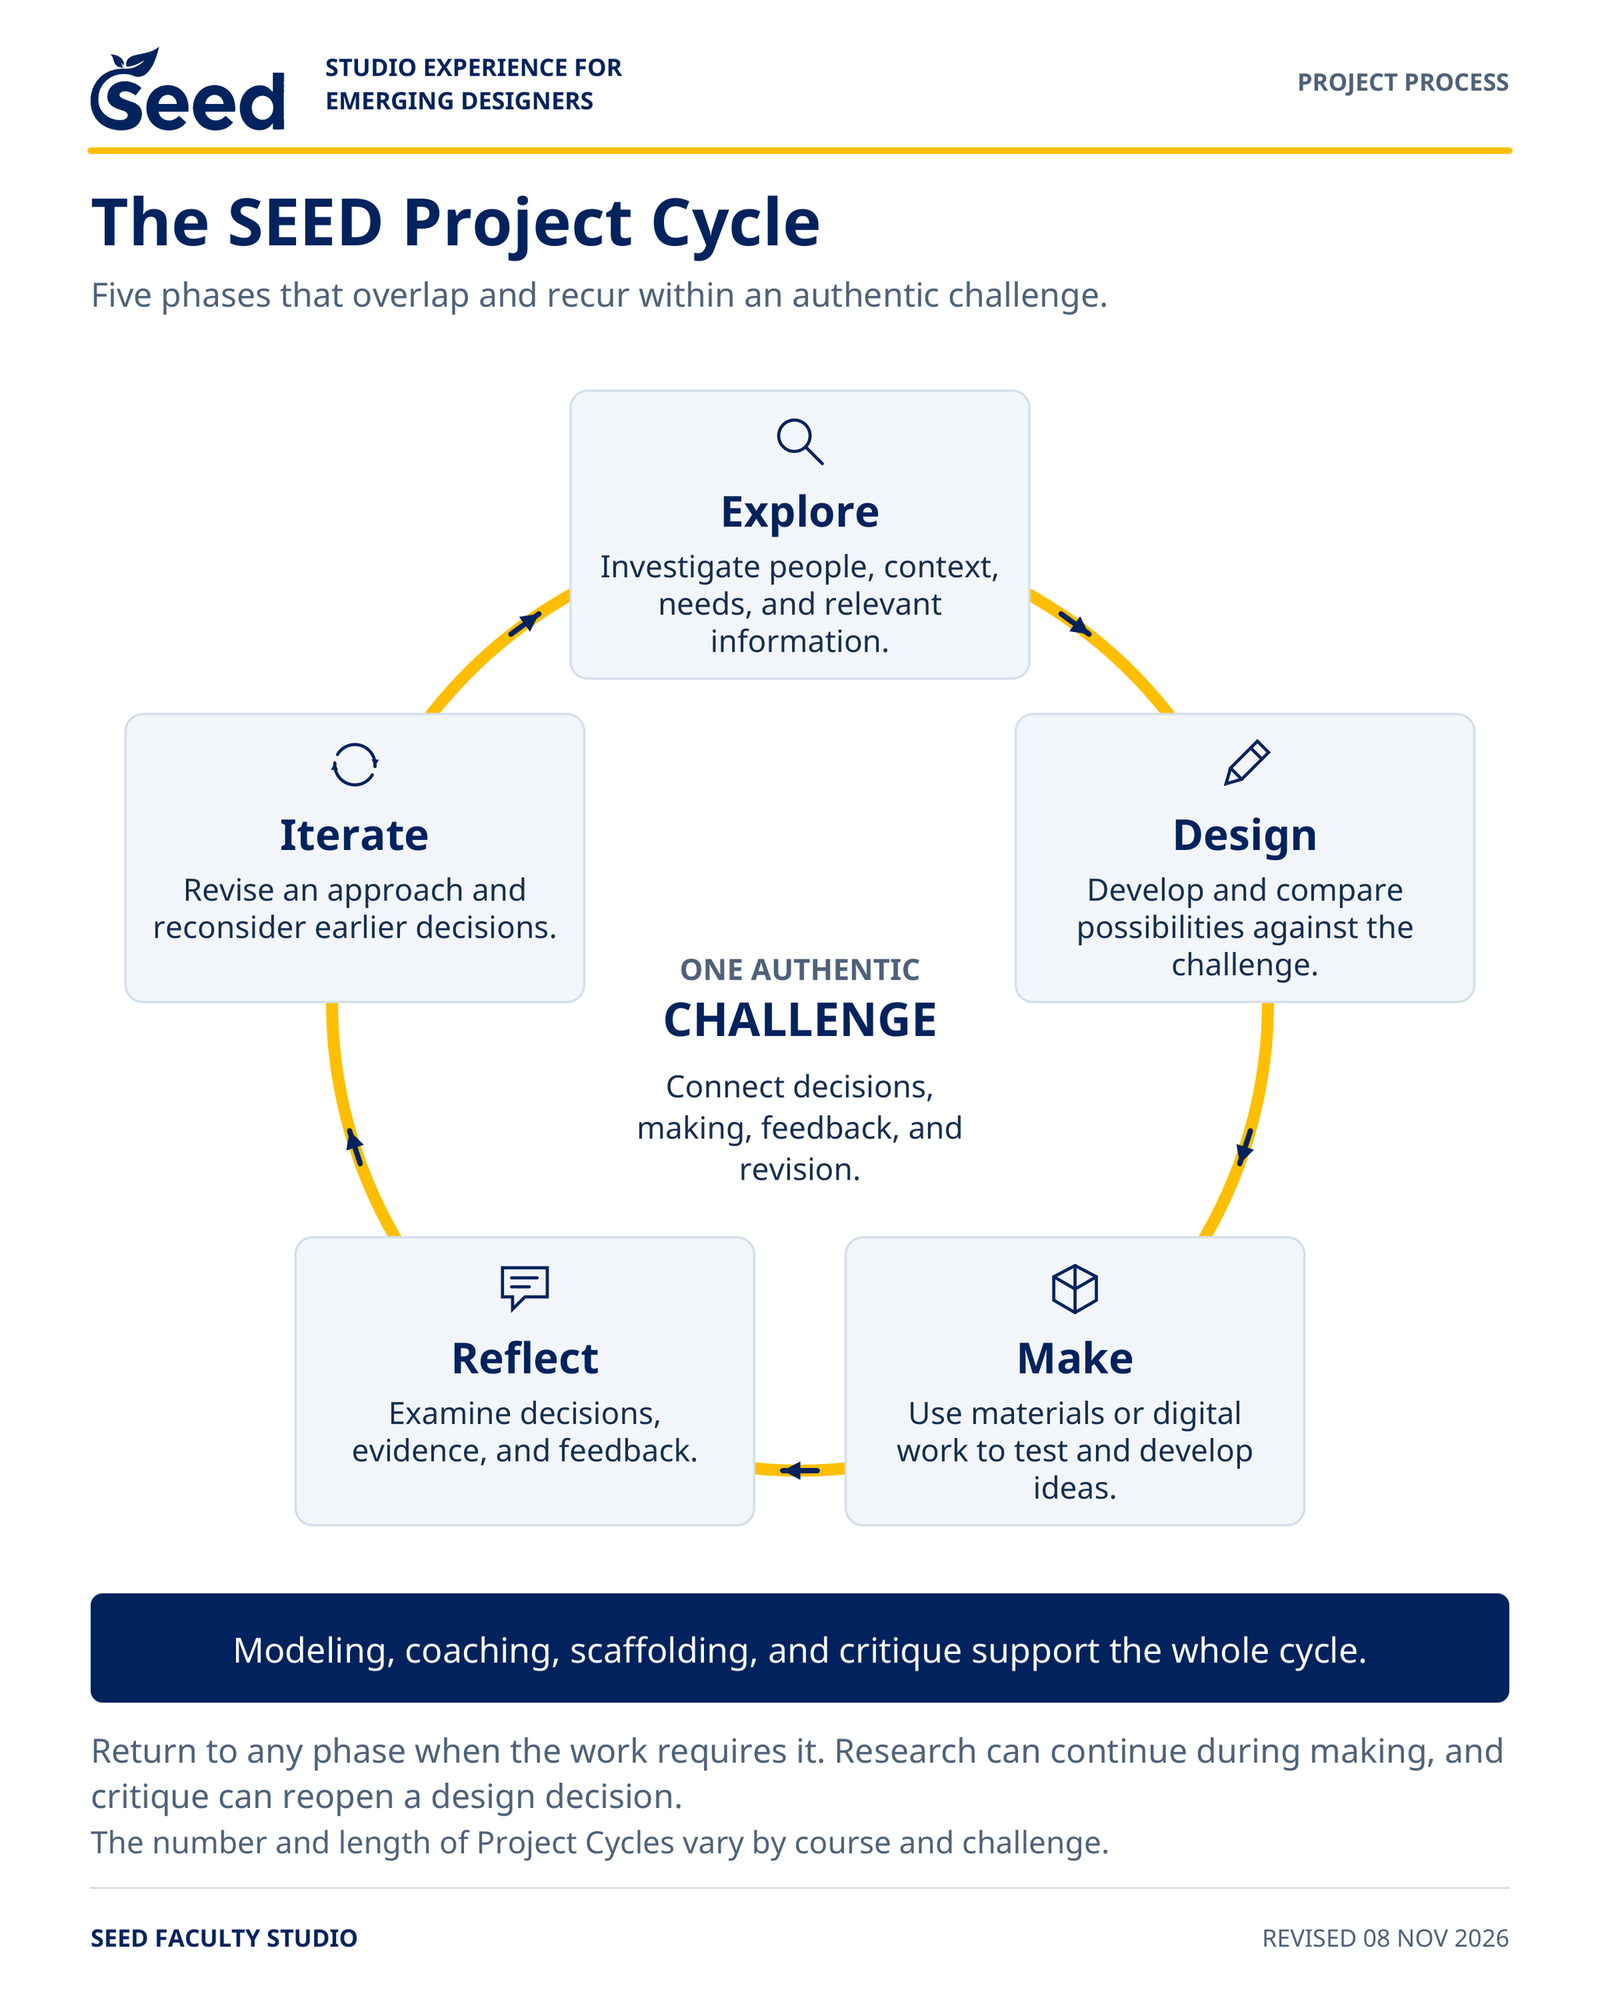
Designing New Models of Living asks students to develop a compact-home proposal for a defined client, Texas location, and innovation focus. Each milestone supports the next design decision.
- Explore: Investigate users, context, and site; establish residential needs and design criteria.
- Design: Develop and compare three schematic alternatives; explain the selected direction.
- Make: Develop plans, elevations, and a massing study to examine spatial and formal decisions.
- Reflect: Compare developing work with the brief and criteria through critique and explanation.
- Iterate: Use feedback to revise and coordinate the proposal before the drawing milestone.
These phases overlap and recur. A massing study may raise a new research question, and critique may prompt another alternative. Modeling, coaching, and scaffolding support decisions throughout the cycle.
Making has a purpose. The early massing study helps investigate and develop the proposal. Later final-model fabrication and exhibition belong to the broader semester work.
Apply it to your course
Identify what each activity helps students investigate, decide, test, or revise. Place feedback early enough for students to use it.
Carry forward: A Project Cycle plan with connected milestones, support, and evidence.
Continue to a weekly studio experience → · Back to the example sections
Coordinate a design decision across drawings and form.
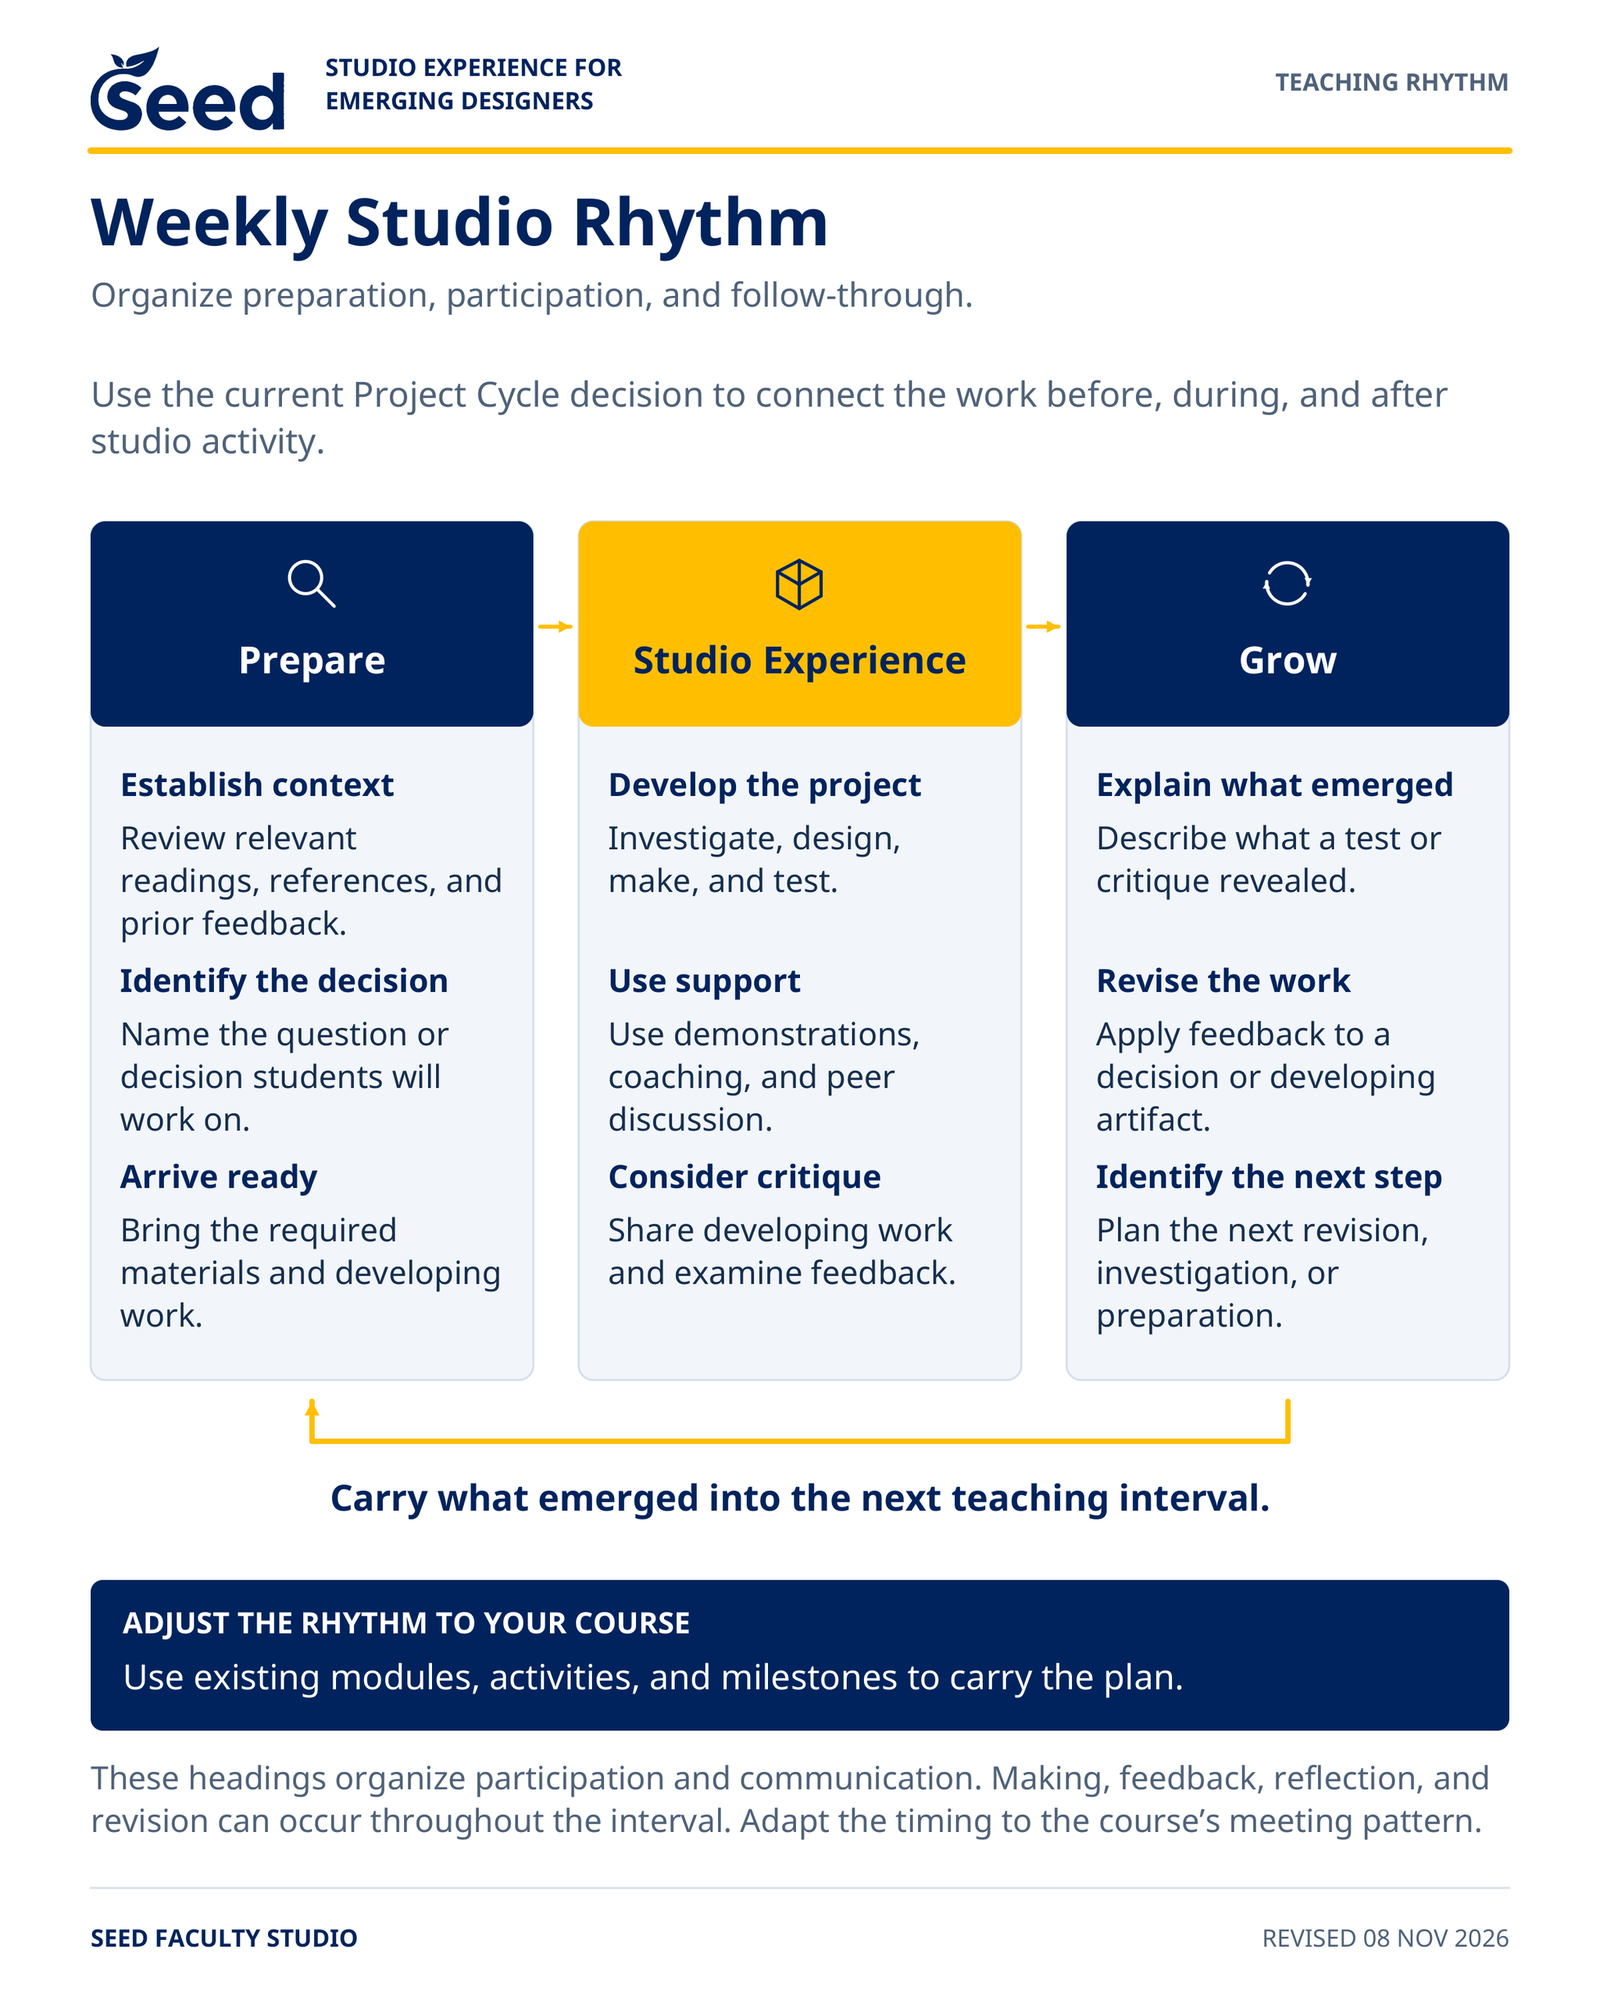
In the Week 5 design-development example within Project Cycle 1, students develop a selected schematic direction. The purpose is to coordinate plans, preliminary elevations, and overall form.
Prepare · Revisit the design direction
Students review the client brief, design criteria, selected alternative, and critique priorities. They bring the developing work and references needed to examine a coordination issue.
Studio Experience · Develop and test
Students develop interior plans and preliminary elevations, using a massing study to examine a spatial or formal decision. The instructor models how a change in plan affects another view or the overall form, then coaches specific coordination decisions.
Grow · Explain and carry forward
A desk critique helps identify a priority against the brief. Students revise that issue and explain the decision. Developing plans, elevations, the massing study, and the explanation carry into the coordinated package for Week 6.
The weekly map connects seven fields: purpose, preparation, studio activity, faculty support, feedback, evidence of learning, and next step. Making, critique, reflection, and revision can recur within the interval.
Apply it to your course
Select one milestone and the next decision students need to make. Plan preparation, studio work, support, feedback, evidence, and the next step around that decision.
Carry forward: A Weekly Studio Experience Map or existing course module that shows the connections.
Continue to feedback and revision → · Back to the example sections
Make the response to feedback visible.
Critique examines developing work against the brief and criteria while it can still change. The KEEP / CHANGE / RESOLVE response helps students identify priorities and carry them into the next milestone.
KEEP
Identify a decision that is working and explain why it should be retained. For example, preserve a relationship between spaces that supports the client’s needs.
CHANGE
Identify a decision to revise and show the response. For example, revise a circulation route and explain how the change improves the proposal.
RESOLVE
Name an open question and the check or test needed next. For example, verify a clearance before completing the coordinated drawing package.
At the next review, students can show their response through a revised drawing, an annotation, a model, or a brief explanation. Reflection may be spoken, diagrammed, or written; assessment uses the relevant course outcomes and project criteria.
Apply it to your course
Choose one review point and a clear basis for feedback. Decide how students will show what they retained, revised, or still need to resolve.
Carry forward: A critique prompt and a visible response in the next milestone.
From the example to your course
Carry the reasoning into your own discipline.
Start with your outcomes, students, professional practices, and available resources. Use a challenge that fits the course, connect its milestones, and make the next studio decision clear.
Use the guide at the point of decision.
Explore purpose and context. Design the connections across plans. Make professional reasoning visible through support and purposeful activity. Reflect on developing work, then Iterate where a decision needs to change.